Showing posts with label Modular Terrain Board. Show all posts

Saturday, October 24, 2020

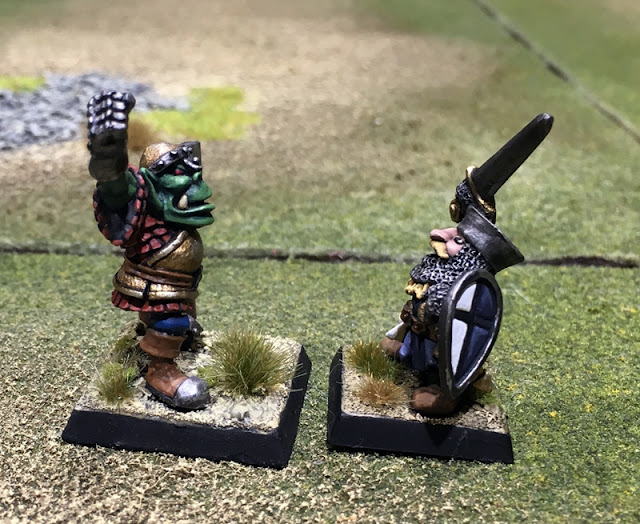
Marauder Goblin Wolf Boys...The Horde Rampages on...

 Hi all,

The time has finally time come for some group shots of the Marauder Wolf boys!  

I had the terrain boards set up for a game of Oathmark that I was playing with my local gaming crew...

...yes! that's right actual in-person gaming was going on!! of course we were in an open garage and keeping our distance.  Everyone had their own dice and tape measure.

anyway... after the game ended and everyone went home I packed up the wolf boys and brought them down to get some shots on the table.

Here they are!! soon to be Rampaging through a village near you!!


Wednesday, May 27, 2020

Oathmark: Battles of the Lost Age ...Part II: Game on!


***Associated Narrative Post HERE ***

Hi all!

After the big build up of the last post lets jump right into the game and see how it plays out.  Just a reminder that this is a follow on to the previous post which laid out the background and army selection for this game.  In these posts I am presenting my initial experience and thoughts about Oathmark: Battles of the Lost Age.  The intro post can be found HERE.

Turn One
Right away I knew it was going to be and interesting night when I rolled for the very first initiative roll and wound up with this insane tie....

Monday, May 25, 2020

Oathmark: Battles of the Lost Age ...Preliminaries


**Editorial Note** Since its initial posting, I have modified a few things and added some scenario details to this post. I also moved the Narrative section to a separate post all together, combining it with the other narrative sections.  That can be found HERE

Preamble

I've got a little something different for you all today...rather than the latest figures I've painted I'm going to share with you my recent exploration of the new set of a Fantasy Mass Combat rules, Oathmark: Battles of the Lost Age.

Oathmark - North Star Military Figures

This new set of rules is put out by Osprey Games and written by Joseph McCullough (creator of Frostgrave).  While I am a die hard WFB 3rd edition fan, I do have interest in a set of mass combat rules that are more simplified and fast moving.  I've dabbled with Dragon Rampant, and Donnybrook but was not over joyed with either and they both had more the feel of a large skirmish game rather than a small unit battle.  Oathmark is the first new set of rules that I've tried that I think will "feel" more like what I'm looking for.

Saturday, July 27, 2019

Dwarf Army Progress Shots...Almost There!!

Hi all,

As most of you probably know I have spent the past six months painting frantically for the second Old World Army Challenge.  It was, once again, a grueling effort but I did manage to finish and add a significant new contingent to my Puff and Slash Dwarf Army...which is my oldest army and one of the largest.

As I was finishing the challenge and and preparing to take some shots of the entire 1000 point force that I had managed to paint...I thought it would also be a good idea to combine them with all my other Empire Dwarf figures to show the current status of the entire army.

This proved to be a lot of fun and, though the set up and prep work took some time I think it was worth the effort.  Now this army is NOT complete...several of the units will be further expanded....several have a few partially painted figures....almost all units are still lacking banners...and there is one entire unit not represented at all in these pics.  Despite these deficiencies I find this kind of photography to be very inspiring and feel that it really gives me a feel for where the army as going as well as indicating what needs to be finished up.

For this photo shoot I used two of my modular terrain tiles and a number of the houses and walls that I scratch built in the last two years...as well as a portion of the Might Fortress.  I'm still having trouble with the backdrop situation, but for the time being I used a sheet of green foam board as my backdrop...less than ideal but sufficient for now.

Anyway...lets take a look...

Here is the Dwarf line of battle for the Grand Army of Salsburg.


Wednesday, January 2, 2019

RT Bat Rep: Escape From Putney Prime!!!


 ESCAPE FROM PUTNEY PRIME!!!
HHeeeeeyyyyy!!!  Ya'll Remember me....?  I'm Back!!!

 Stardate: 1001.2356
Location: Surface of Putney Prime

Corporal Grove could almost taste that the Combat Burger now! All he had to do now was get off this hell planet and back to the space station and he was going straight to the burger shack for a meal....

Monday, October 2, 2017

New Terrain in Use! Orcs attack!

Howdy Ya'll!!

Before I had the excellent game of Donnyhammer with my local gaming group the other day I also took the opportunity to have a bit of a photo session with my newly completed houses and a couple of my Terrain boards.

For this effort I employed two of my completed Terrain boards and set them up with all the lights I have on hand and "decorated" them with all the buildings and rock walls that have been the subject of several of my last posts.

This is what the set up looked like before I populated it with figures...


Tuesday, September 26, 2017

DonnyHammer 1.0

Hi all,

Once I had my terrain boards and houses completed I started to really itch for an opportunity to get them on the table for a game.  I've also been getting pressure from my local gaming friends to host another game...and I've been wanting to give the Donnybrook rule set a try on my own.

I've played a couple of low key games with My Boy Airborne Grove in the past but hadn't tried to host one myself...and that required gaining a more complete understanding of the rules and adapting them as much as possible to the Warhammer world and "feel."


If you are not familiar with Donnybrook...well you should be!  This is a fantastic set of historical rules written by Clarence Harrison and Barry Hilton.  The rules are focused on skirmish sized battles in the late 17th and early 18th centuries...though Clarence does include some basic pointers for how to add some fantasy elements to the game as well.  The game has a number of really interesting features...the two most prominent of which are the Card based activation system...and the use of different dice to represent different quality troops.


With the Card based Activation you break the monotony of IGoUGo play...which is standard in warhammer games.  This adds a real tension to the game as it is unclear when your (or if) a particular unit will get to move again.  There is a card for each unit and character in both forces...these are shuffled between each turn so come out in a random fashion.  There is also a Turn End card in the deck which can cut any turn short unexpectedly.


The dice mechanism is equally interesting.  Most actions...shooting...combat...leadership etc. all have a target number for success (typically 5 or 6)...but as the quality of your troops increases so does the number of sides on the dice they use for that test.  Raw recruits use a D6...and therefore have a hard time achieving their goals....while elite troops use a D10 and have a much higher chance of success...heroes use a D12 etc....its very clever and works great in practice.

The challenge comes in adapting this system to Warhammer forces without losing the "warhammery" feel of the game.  I feel I had mixed success with this aspect of the game...but see plenty of area for improvement.

For my game with my local crew I pulled together a mixed bag of "Good guys" consisting of some of my Bretonnian collection and some of my dwarfs.


For the "Bad Guys" I used some of my Orcs, Chaos Dwarfs and a friends Skaven  troops (sadly I did not get a good studio shot of them).


We played a general encounter battle...with no particular mission other than driving the enemy from the field.


The game played out very smoothly without needing to reference the rules overly much.  There was a period of adjustment as we were all new to the rules and all our previous gaming had been with Rogue Trader or WFB 3rd edition.  Plus, other than my stalwart companion Bob (who supplied the Skaven), the other three players are only casual wargammers...the type that rely on me to supply figures, terrain, and rules...but bring a lot of enthusiasm, laughter...and beer to the the game.

Anyway...here are a few more pictures...


In the end I think that most people like the card activation system...though there was a bit of grumbling...particularly when units failed to move at all for a couple of turns. In particular the right flank of the Good Guys force was immobile for a couple of turns in a row.

In an effort to make the game play a bit more like Warhammer I had opted to make the range of bows and crossbows 24 inches...instead of the 12 inches suggested in the Donnybrook rules.  This may have proven to be a mistake as missile fire dominated the game to a large degree.  In particular the attack by the Goodies left flank was decimated by missile fire from the bad guys right flank...which had watched their own left flank destroyed in much the same way by the good guys archers earlier in the game.

For future games I will reduce range to 18 inches and see how that works...perhaps increasing saving throws for the victims of missile fire would be another option.  Also additional terrain would be helpful...the wide open space in the middle of the board was just a killing ground for missile troops.

One other area that I feel needs addressing is the fact that with Donnybrook being a historical set of rules the heroes are powerful...but not in the way they are in Warhammer.  Namely they have just one attack...like normal humans would.  This left many of the players feeling unsatisfied with the heroes and large models (ogres) and in the future I will adopt multiple attacks for heroes and elite troop...perhaps 2 attacks for D10 units/characters and 3 attacks for D12 characters and monsters.  This should allow them to have a more impressive influence on the battle without becoming over powered.


Overall this was a great game...and while we identified some rules that needed refinement we had a lot of fun playing...and of course that is the main goal of any game.  I highly recommend the Donnybrook rules to any interested skirmish player and feel they provide a very adaptable framework for modification to fit alternative environments like Warhammer fantasy.  Stay tuned I'm sure that further adventures in DonnyHammer will be forth coming soon.

Cheers,

Blue

Wednesday, March 22, 2017

Blue's Modular Table Part VII

So...lets wrap up the Table making for now!!!

As you may remember in the last installment I had applied the final highlights to the brown earth areas and had painted the rocks and rubble patches (including cliff faces) a medium grey and highlighted those as well.

At this point there is isn't much left to do...

...except for the water feature....but we will save that for the final blog post (cause I haven't done it yet!)

For the final texturing of the boards I went back in and added some static grass and tufts to strategic locations.  This added some variety and point contrast to to the dominant tan/green/grey areas of the boards.

Tufts were sparingly added to the rubble patches and tucked into crevasses etc. in the cliff faces.  This gives the impression of plants that found some level of protection nestled between the rocks and are growing out.

Saturday, March 11, 2017

Blue's Modular Table Part VI

Once more into the Breach my Friends!!!

Painting of the tiles continues!  Lets take a look at the next steps.

Following along with the system outlined in the last post I have continued to work into progressively lighter browns for the roads, rocks and rubble on the modular tiles.  The third color to be applied is the VMC Khaki Grey.  For the application of this color I transitioned into actual Dry brushing.  I used a small cardboard box lid as my pallet...I get a little bit of paint on the bristles of a soft 2-inch bush and then work most of it off with several passes on the cardboard.  Then I apply the color to the terrain board with very soft strokes...allowing the color to adhere to raised portions of the texture on the tile while leaving the darker colors in the "recesses" of the texture.

Here is what a couple of the boards looked like after this step.  Once again note that the area of earth color continues to expand onto/into the large green swaths...further breaking up the putting green feel of portions of the tiles.


Wednesday, March 8, 2017

Blue's Modular Table Part V

...And now back to your regularly scheduled programming...

We have reached the point where it is time to get some new colors on the modular tiles in order to further break up the "putting green" portions of the boards and to make everything a bit more realistic.

This is a s multi step process and I will probably spread the painting over at least two posts.

The first step was to apply textured paint to all the areas that I had covered with filler and the patches of rocky terrain I had created with the coarse ground coffee.  Following Clarence's suggestion I went to the local Lowes and looked at the premixed textured paint...but they only had it in ENORMOUS 5-gallon buckets...which is obviously WAY too much for my needs.  After consulting with the paint expert at the store I settled on a quart of flat latex Behr Paint (called Earth Brown) and a small container of texture material...which is basically fine grain sand.  I also bought an empty quart paint can so that I could mix a portion of the Brown paint with texture, while retaining the rest of the paint in the original can.  In the new can I added a couple of inches of paint and mixed in some texture...I stirred that with a paint paddle...and then assessed the amount of texture by brushing some of the mix on a scrap piece of foam I had nearby...I ended up adding a bit more before I was satisfied...but it was as simple as that. The textured paint is really going to pay benefits when it comes to the later phases of dry brushing.

As I mentioned this was painted over all rough texture patches (coffee grounds), cliff faces, and road ways.  I made sure to thoroughly cover all the filler and overlapped onto the surrounding grass mat a bit.  Additionally I made a few random patches of texture on some of the open terrain areas...to further break things up.  Here is how it looks on a number of the tiles.


Once all areas had received a good coating of paint they were set aside to dry overnight.

For the second phase of the painting process I chose three paint colors that would work well with the colors I use on my figure bases.  I have a consistent basing technique for all my fantasy figures...and this is where that is going to pay off...if I can match the colors used on my table and on my bases the figures will look like a part of the table...and that's a significant goal of mine.(If you are interested in my basing technique, a full breakdown can be found here).

The colors I wanted to replicate are all from the Vallejo Model Color Range:
  1. VMC 140 Flat Brown
  2. VMC 880 Khaki Grey
  3. VMC 976 Buff
To insure a decent match I painted a swatch of each of these three colors onto a 3"x5" card and brought it back to Lowes with me.  At the store they were able to scan each color with their "magic eye thingie" and custom mix colors to match.  As I didn't need a huge amount of each color I had them mix me up tester pots (8fl oz) each of which cost less than $4....quite a bargain IMO.


The colors looked pretty much spot on to me...so lets get the painting started.

First up was applying a pretty heavy coat of the Flat Brown....I didn't completely cover the textured dark brown...but it wasn't dry brushing either...lets call it wet brushing!  Basically I laid down a pretty heavy layer of paint but didn't go back to fill in any spots that were missed due to texture etc.  Like previous coatings I overlapped onto the grass mat...often transitioning to more of a stippling application in these areas.

Here are a couple of before and after pics of the boards after this layer of paint...in these you can see how much I expanded the earth colored areas around the rougher terrain.


I realize there is still much to do...but with each step it becomes more obvious to me that I'm headed in the right direction!

Next up we will apply the last two colors to the earth areas and then start recoloring the cliff faces and gravel to gray.

Cheers for now!

Blue


Thursday, March 2, 2017

Blue's Modular Table PartIV

So...On with the Show!!

Now that we have the grass mat texture on all the appropriate portions of the six tiles it is time to start putting some additional texture on them.  Step one of this will be to use Spackle (wood filler) to texture the roads and seal the edges of the cliff features and pond.

I used a putty knife for this operation and started with the road beds.
I plopped a scoop of the Spackle onto the road and spread it with the knife working from the center of the road out to each side in turn.  I made sure that the filler over lapped onto the grass mat a bit and fully sealed the cut edge of the mat along the road. 

 Next I smoothed the center of the road bed by dragging the knife along the length of the road...this further smoothed the putty and added some texture that suggests wheel ruts etc.  At this point many people use some kind of device to create actual wheel tracks in the putty...but I was satisfied with the appearance of the roads after the putty work and decided to skip this step.


Putty was also used around the cliff and pond features to seal grass mat edges and ease the transition into the broken terrain.  Once the putty was applied all the tiles were set aside and allowed to dry thoroughly for a day. 

Here are a couple more the tiles with putty applied.


The next step was to add cork bark pieces to the cliff faces to give them some interesting texture.  Frustratingly I forgot to get pictures of this process....but here it is in a nut shell.  I purchased a large piece of cork bark from the pet supply store near by and then I broke off pieces and picked through the pile of bits to find ones that fit well on each of the cliff faces.  The bark pieces were attached to the underlying foam with a hot melt glue gun.  You can see the results in some of the following pictures.  The cork bark was not cheap ($16...I had a gift card...:) ) but it has wonderful texture that will look great when dry brushed.  That said I think that many different types of bark could be just as effective...On the Quindia blog posts Clarence used pine bark pieces and they look fantastic.  So look at the options and see which type of texture suits your design goals. 

Here is the one picture I have that shows some of the bark in place.


Once the cliff texture was in place I moved onto adding patches of rubble/gravel to a number of areas on each tile to help break up the "putting green" of the open terrain and to add more interest to the roads and cliff areas.  Clarence suggested using ground coffee for this application...at first I thought this was an odd choice...but then I remembered a bag of course ground (decaf...ewww) coffee that had lived in our camping equipment for at least two years and never been consumed...and I figured it was the perfect application for these useless beans...

To actually add the texture I applied patches of wood glue randomly in open fields...along roads...etc.


Onto each patch of wet glue I applied a pile of the coffee grounds and set aside the tile to dry.  I was very generous with the coffee...to insure that all the glue was covered....the excess coffee grounds were removed using a vacuum once I was sure the glue was dry.


Significant amounts of glue and coffee were added at the margins of the cliff features to represent small rocks and scree...again it is good if this spreads onto the grass mat to ease the transition between the two textures.


Here you see the excess coffee has been removed with the vacuum
As the tiles were finally starting to look like something I took the opportunity to lay out all six of the tiles and get a group shot.  I'm liking it...but there is still a lot to do!


It is finally time to start adding some color!  Painting is up next.

Cheers,

Blue


Tuesday, February 28, 2017

Blue's Modular Table Part III

Well...here we are again...

After completing the build of the tiles and adding the necessary features (hills and pond), it was now time to turn my attention to surfacing the tiles.  Continuing to follow the process outlined on the Quindia Studios Blog, I opted to surface my boards with a Grass mat.  Luckily I happened to have one that was laying around unused and unloved....so this was a perfect application for it.

I liked the reuse of unloved materials with this process, but I had one major concern.  The grass mat I had was a 6'x4'...which is exactly the size of the area that I was needing to cover...my concern being that the hills would require more cloth than a flat tile and perhaps I wouldn't have enough cloth to completely cover my tiles.  But I figured it was close enough and if I was careful about piecing out the grass mat I should have sufficient material...so I plowed boldly ahead!!!


Starting with the "Open Terrain" tile I cut a piece of Grass mat just slightly larger than the tile.  To attach the Grass mat to the foam and frames I relied, once again, on Wood Glue....this was applied to the foam and then spread around with a moist paint brush to insure good coverage.

FYI this is NOT enough Glue...Twice this amount is about right

The piece of grass mat was flipped over and moistened by spraying it with water from a hand sprayer.  We are looking to loosen up the fibers of the felt backing enough to let it stretch a bit...but not making it so damp that the flocking starts to fall off. I think that the extra moisture also facilitates a bond with the wood glue. 


This was then flipped over and laid carefully on the tile and thoroughly smoothed down with my hands...making sure to smooth the entire tile. 


It was then set aside to dry as I moved on to the next tile.

NOTE: Particular attention must be paid to the edges of the boards where you want to make sure you get a good seal.  I found, to my consternation, that some of mine were not glued properly at the edges once they dried...but it was a simple mater to go back and apply some more glue to those specific areas.

Once you are confident that the edges are sufficiently adhered to the frame and glue is dry...then it is time to trim the edges.  This is done with a very sharp knife...Clarence recommended a Exacto knife with a new blade...as pictured here.


I found this to work but I was going through blades like crazy so I switched and started using one of the many cheapo box cutters that I had in my workshop.  These worked great...and when a blade started to get a bit dull and started to catch on the fabric I simply clicked out a new blade and kept cutting.  I think I got these for $.50 a piece in the check out isle at Home Depot.  I'll be getting a few more!


Being a bit nervous about the process at first I focused on the three completely flat tiles...the Open Terrain, S-Curve Road, and Farmstead Road tiles to be specific.  For the two tiles with road sections I glued the cloth down right over the marker road I had drawn previously...it was really just there for planning and visualization purposes.  Once the Glue had had a couple of hours to set I redrew the roads onto the mat and then cut them out with a sharp knife (box cutter)...carefully removing the unneeded pieces of grass mat. 


Don't worry if you cut into the foam itself during this process (I doubt you could avoid doing so!)  ...any cut marks you made will be hidden in later steps.  This leaves the road sections nicely defined and slightly "sunken" from the areas surrounding them.  This affect will be further enhanced in future steps.


Things got slightly trickier with the hill sections.  For the Large Hill and Pond Tile the difficulty came in trying to get the cloth to lay smoothly over the contour of the hill.  This was somewhat aided by the dampened cloth which could be stretched slightly to accommodate the shape to some extent...however...I was still left with a small "bunched" area of cloth at one end of the hill. 


Luckily I plan for this area to be an exposed rocky cliff so I will be able to cut out most of this excess cloth leaving only one short seam to be disguised by later efforts.

You can see that I also removed the cloth piece that was covering the pond.


 For the castle hills the cloth "behaved" a bit better as the hills are not as steep.  My main problem with them was that I was running out of cloth.  I solved this problem on the large hill by using small pieces of cloth and not completely covering the road section.  Omitting this piece of cloth (which would have been cut out anyway) provided me with the extra couple of inches needed to insure coverage of all the panels.  It was a near run thing... but it all worked out.

Large Castle hill with Roads and cliffs cut out
 In the next step we will start adding some texture to the roads with wood filler....time to get some life back on these boards...right now they look like well manicured putting greens!  Which is not really the effect I'm looking for...:)

Cheers for now!

Blue