As I finished up the Averlanders' from my last post my mind shifted quickly to thinking about the teams that I wanted to put together for the last round of the LPL....which was also a themed round: Sci-Fi. With this topic in mind, over the last couple of months I have been slowly expanding my very modest collection of 40k models....first with some Squats and later with some Marauder Orks (the only 40k models produced by Marauder). I had two excellent teams picked out and was already thinking about how to display them for my final shot....when the whole ankle thing happened....and those thoughts went right out the window.
My new reality for the foreseeable future was that I would only be able to sit at the painting desk for very short (30-45minute) sessions once per day. This is required a new system. So I quickly forgot about the squats and focused on a group of the Orks. Having read about some new (to me) fast painting techniques I decided to give one a try.
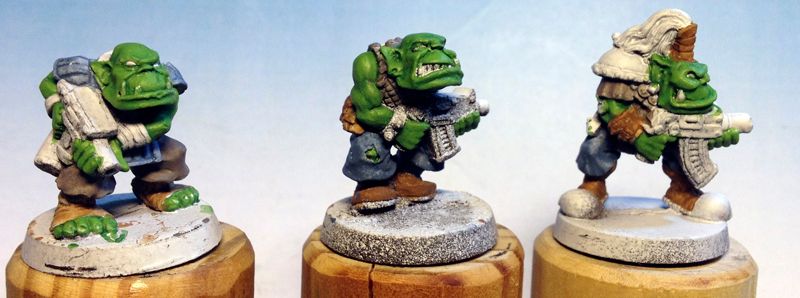
I started by base-coating the figures with my normal Dark grey primer. I then attempted to give them a Zenithial Highlighting...which I found was hard to do with a spray can....but there was no time for a second attempt...so I went with it. Here is what they looked like....as you can see the droplets of spray from the can are too big and coarse...I can see why most folks that employ this technique do so with an air brush.
Here is what they looked like.
I then started to apply a very watered down coat od my ancient Goblin Green to the Flesh areas. The idea here is to let the zenithial highlighting "shine" through the thinned payers of paint to add some instant shading.
I then did the same thing to the cloth, leather and armor portions of the models.
Areas that were going to end up as metal were painted solid black and teeth were given a coating of bone. When all areas had their thinned base coats applied I then slapped a coat of Miniwax Tudor Stain on them and let them dry overnight.
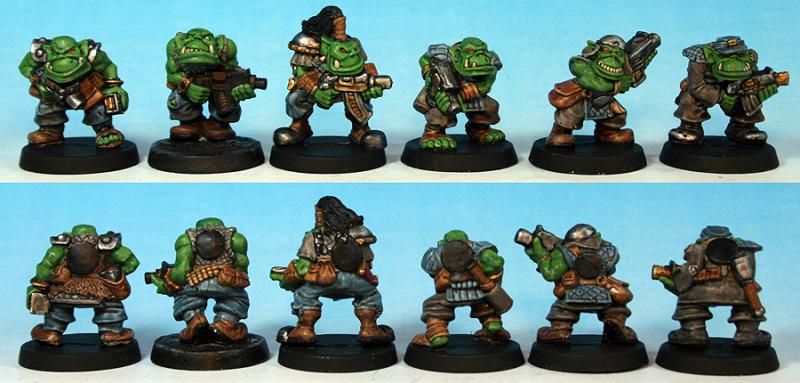
Once dry and coated with Vallejo brush on Matte varnish I painted up the metal areas using my normal technique and took care of any details like eyes and teeth.....and they were done! Record time for me...I bet I spent less than 3 hours painting 6 miniatures...thats fast for me! No they won't win any prizes...and they got stomped in the competition...but I got a new team in (personal victory) and I didn't further injure my ankle by spending too much time at the desk...here is the final result
I found this new (to me) technique to be very interesting and something that I hope to refine in the future....perhaps a post dip highlight on the flesh might make them "pop" at bit more. I think a finer spray for the zenithial highlight like you can achieve with an airbrush would make a major difference as well....I might just have to put one on my wish list.
Cheers,
Blue
Showing posts with label Dip. Show all posts
Showing posts with label Dip. Show all posts
Monday, June 24, 2013
LPL Round 10: ....This is the End.
Labels:
40k,
Bulk Painting,
Dip,
Green Skins,
Rogue Trader
Saturday, April 20, 2013
Blue does the "Dip"
WHAT!? Two posts in one day! That is unheard of!!!....
hehe...well lets give it a go...
After seeing the results of several recent posts about "dipping" I decided to give it a try myself. Now no one around me carries Army Painter Products...and I didn't really want to pay $30 for an experiment anyway...plus several people "in the know" assured me that the AP version was just repackaged wood stain ...so...I decided to go with the Minwax Polyshades "dip". Now in my copious reading on the subject most people suggested AP strong tone or, its rough equivalent Miniwax Antique Walnut, as the most useful colors. I actually had a $5 coupon to my local hardware store so I picked up a tin...only $3 with the discount so why not!
To test this technique I thought some of the 4th edition Savage Orcs would be useful. So I primed one in white and slapped some base colors on it...I used the old Goblin Green that I've had for eons for the flesh...this is my normal highlight color. The rest I did with "brighter than you would think necessary colors" and then I Brushed on a coating of the Antique walnut stain....I let it dry and it looked HORRIBLE! But I knew that it needed a coat of matte varnish before I should make my final judgement...so hit it with some Testors Dullcoat and it looked better...still not good... but better....take a look...
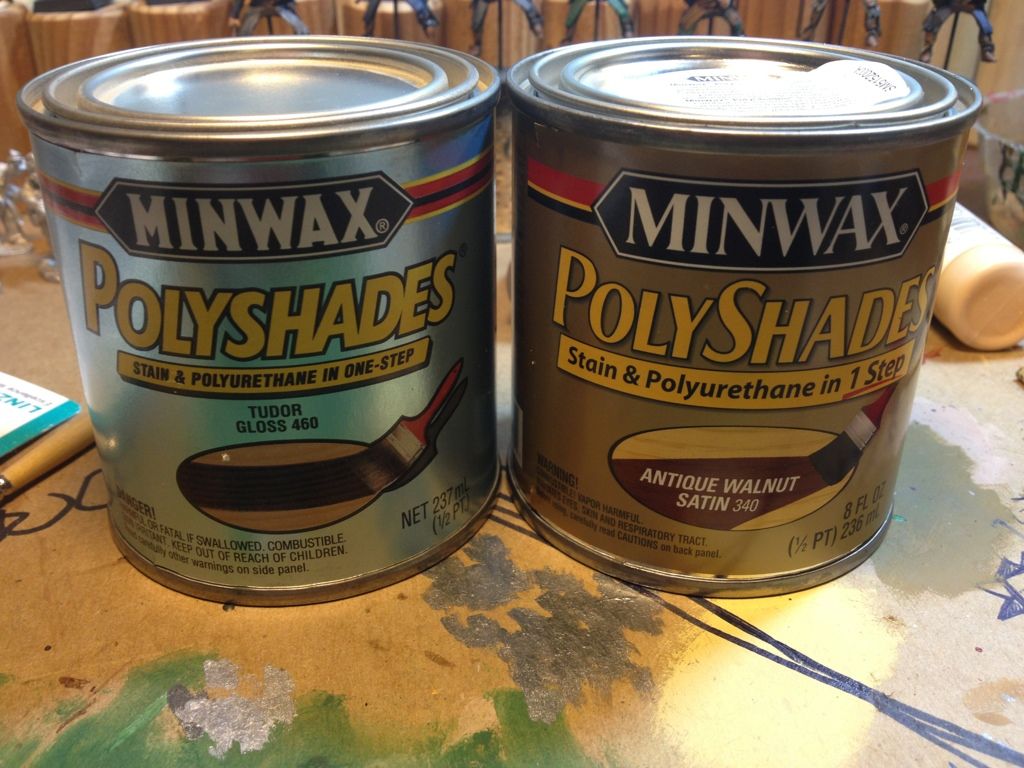
To my eye the Brown colored stain was just the wrong choice for this figure....it looked bad on the Green flesh and just wasn't working for me. So I found my way to an ACE hardware...the only place that seems to carry the black based Tudor Stain in my area...luckily they had a can...from the dust on top I could tell it wasn't a popular color but I was very happy to find it. It cost me another $8 but I'm still coming out ahead compared to buying AP Quickshade. Here are the two cans side by side.
With the Tudor stain in hand I picked another Savage Orc and got to work...and I remembered to take pictures this time! :lol:
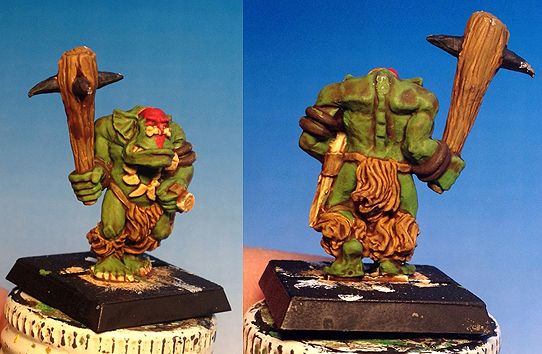
So again I primed white and slapped some bright colors on this dude...it took me about 15minutes to block in the base colors....here is what he looked like pre-dip
I then brushed on the well stirred Tudor stain....using the brush and a paper towel to remove larger than wanted pools of the stuff...and let him dry over night....here is the result.
YIKES! That is terrible! Quick! Get the Dullcoat!
Ahhh...that's better....in fact that's a LOT better. I personally think he looks pretty good! considering the time I put into him he looks alright!
Of course everybody looks better with a completed base...so I finished him off like my usual figures.
Hey hey! Not Bad! Not going to win any contests with them but overall quite pleased...and a complete unit of these is going to look great. The only post-dip highlighting I did was on the blue war paint where I picked out the VERY highest of highlights...took a total of 3 minutes. I also painted the metal...in this case copper rings on his arms and neck...using my usual highlight and sepia wash and he was done. Obviously he still needs a shield but I haven't found the right ones yet... :?
So...overall I will be quite happy to use this technique on certain troop types. For now it will be restricted to my 4th edition Orcs and possibly my Marauder Beastmen (I'll try the walnut on them again...might be a better fit)...but if I can get them on the table fairly quickly I will be more than happy with this experiment and the paltry sum I laid out to conduct it. I won't be using this on units that are closer to my heart...like any of my dwarfs etc. Those I will continue to paint in the normal fashion....which produces much better results overall...but does take a considerable bit longer to complete to satisfaction.
As an after note I was a little concerned that if in the future I wanted to re-paint these in a more traditional fashion that the dip would make it hard to strip the paint off. This proved to be a non-issue....I put the first orc with the brown stain in my normal Simple Green bath and it cleaned up very nicely.
So...thats my experiment...for what its worth!
Cheers,
Blue
Labels:
Bulk Painting,
CD Warband,
Dip,
Green Skins,
Minwax
Subscribe to:
Posts (Atom)


