hehe...well lets give it a go...
After seeing the results of several recent posts about "dipping" I decided to give it a try myself. Now no one around me carries Army Painter Products...and I didn't really want to pay $30 for an experiment anyway...plus several people "in the know" assured me that the AP version was just repackaged wood stain ...so...I decided to go with the Minwax Polyshades "dip". Now in my copious reading on the subject most people suggested AP strong tone or, its rough equivalent Miniwax Antique Walnut, as the most useful colors. I actually had a $5 coupon to my local hardware store so I picked up a tin...only $3 with the discount so why not!
To test this technique I thought some of the 4th edition Savage Orcs would be useful. So I primed one in white and slapped some base colors on it...I used the old Goblin Green that I've had for eons for the flesh...this is my normal highlight color. The rest I did with "brighter than you would think necessary colors" and then I Brushed on a coating of the Antique walnut stain....I let it dry and it looked HORRIBLE! But I knew that it needed a coat of matte varnish before I should make my final judgement...so hit it with some Testors Dullcoat and it looked better...still not good... but better....take a look...

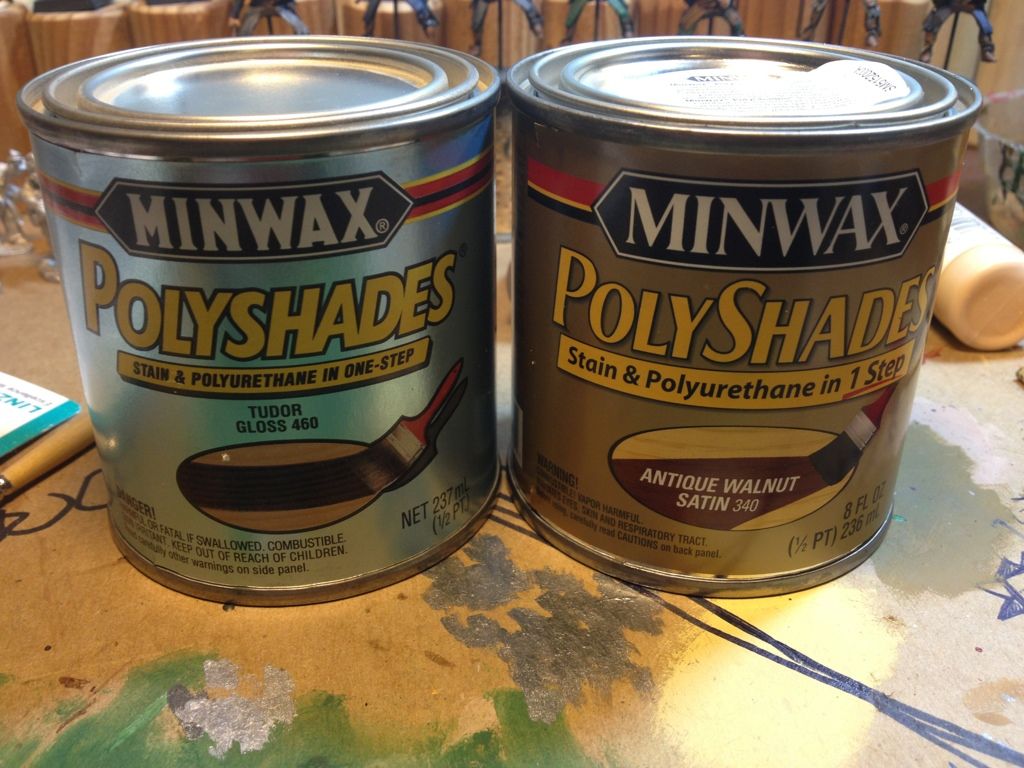
To my eye the Brown colored stain was just the wrong choice for this figure....it looked bad on the Green flesh and just wasn't working for me. So I found my way to an ACE hardware...the only place that seems to carry the black based Tudor Stain in my area...luckily they had a can...from the dust on top I could tell it wasn't a popular color but I was very happy to find it. It cost me another $8 but I'm still coming out ahead compared to buying AP Quickshade. Here are the two cans side by side.
With the Tudor stain in hand I picked another Savage Orc and got to work...and I remembered to take pictures this time! :lol:
So again I primed white and slapped some bright colors on this dude...it took me about 15minutes to block in the base colors....here is what he looked like pre-dip

I then brushed on the well stirred Tudor stain....using the brush and a paper towel to remove larger than wanted pools of the stuff...and let him dry over night....here is the result.

YIKES! That is terrible! Quick! Get the Dullcoat!

Ahhh...that's better....in fact that's a LOT better. I personally think he looks pretty good! considering the time I put into him he looks alright!
Of course everybody looks better with a completed base...so I finished him off like my usual figures.

Hey hey! Not Bad! Not going to win any contests with them but overall quite pleased...and a complete unit of these is going to look great. The only post-dip highlighting I did was on the blue war paint where I picked out the VERY highest of highlights...took a total of 3 minutes. I also painted the metal...in this case copper rings on his arms and neck...using my usual highlight and sepia wash and he was done. Obviously he still needs a shield but I haven't found the right ones yet... :?
So...overall I will be quite happy to use this technique on certain troop types. For now it will be restricted to my 4th edition Orcs and possibly my Marauder Beastmen (I'll try the walnut on them again...might be a better fit)...but if I can get them on the table fairly quickly I will be more than happy with this experiment and the paltry sum I laid out to conduct it. I won't be using this on units that are closer to my heart...like any of my dwarfs etc. Those I will continue to paint in the normal fashion....which produces much better results overall...but does take a considerable bit longer to complete to satisfaction.
As an after note I was a little concerned that if in the future I wanted to re-paint these in a more traditional fashion that the dip would make it hard to strip the paint off. This proved to be a non-issue....I put the first orc with the brown stain in my normal Simple Green bath and it cleaned up very nicely.
So...thats my experiment...for what its worth!
Cheers,
Blue
Brilliant stuff! I've been eyeing off my pile of 4th edition savage orcs with a view to getting them started. I was debating whether or not to dip as a brown tinge on green/blue often looks pretty ordinary. HOWEVER, these look GREAT, especially for the investment in time. Thanks for sharing!
ReplyDeleteNice post! I made the jump to dip for my fimir at the start of the project, and it is a great time saver. I tend to work over it a bit like you do, which does defeat the purpose of it somewhat, but when you limit that to areas of interest like faces, shield and such it's amazing what you can get away with.
ReplyDeleteThere's a fair bit of snobbery about when it comes to dipping. But my usual reply to people who say "your cheating, its not painting!" Is "stop using inks & glazes then."
ReplyDeleteI've used the dipping technique a few time's, but only on things that are a real bastard for me to get right i.e. human skin.
I saw a friend of mine use the Army Painter, but i wasn't impressed, it was too runny & just pooled everywhere. I went the other route and sourced the polyurethane base component (clear) & then just got the colours i needed. I experimented with the consistency by adding white spirit until it was just right.
In the end it worked good, but your models do tend to start looking "the same". You have to use a lot of light contrasting colours to try & avoid this.
That was a bit too long of a reply, but hey, hope it helps :)
"your cheating, its not painting!"
DeleteWho cares, especially if it stops armies or half painted troops or even worse unpainted lead/plastic appearing against your lovingly painted minis?
"but your models do tend to start looking "the same"."
Which is why I (and I suspect Blue) end up overpainting and highlighting some areas.