First I must give credit where it is due. I did a ton of online research looking for different techniques of highlighting Black...most of which are complete crap that at best give you a model that is more Grey than black. Eventually I stumbled onto a youtube video that displayed a "technique" that I thought was worth giving a try. While this video shows a painter working on a rather large figure ... the techniques he employs work very well on 28mm minis as well. Take a look and see what you think... (warning the music is terrible (IMO) but you don't need to listen to see what he's doing)
Now I didn't follow this video slavishly...but rather used it as a guide. First of all I don't own any of the colors he used...and secondly I hate watering down my paints to that extent. But all that aside, the thing that I found useful in this demonstration was the idea that if you make a really dark grey/black base coat that incorporates a little bit of other much lighter colors...when it comes time to highlight you can use those colors as your "lighter shade" and they blend much more smoothly than just adding white to black....with black once you start adding white or another drastically different color it tends to change the character of the black completely and is often chalky in appearance. By using these rather unusual highlight colors, which are already incorporated into the base coat, you avoid these issues and g
et very realistic subtle highlights on black cloth. This is not mean feat.
So here is how I adapted the technique in the video to my situation and preferences. Since I didn't have the colors he used I attempted to find the closest things in my paint box. Here are the four paints I chose.
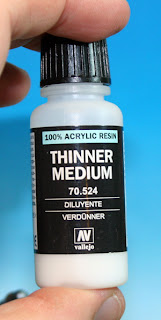
I mixed a small amount of each of these with a big blob of black. The result was very dark warm grey with hints of green. I then thinned it with a couple of drops of Vallejo Thinning Medium...but not nearly to the extent that the gentleman did in his video. I prefer my paint to be as thin as skim milk....any thinner than that and it annoys me.
This really dark grey base coat was applied to all black cloth areas...as you can see its quite a bit darker than even the dark grey auto primer I use.
For the first highlight I added three small drops of the VMC German Feldgrau (830).
This lightened the base coat only slightly but accented the greenish quality of the base. Its hard to see this layer very effectively in these photos but it looks "different enough" in real life to make it worth while.
...and so the process continues...for the second highlight I added a couple of small drops of the Khaki Green (880). This addition warmed up the base coat quite a bit and lightened it slightly. This highlight is a bit easier to distinguish. Obviously with each step you are coating smaller and smaller areas of the model. each highlight should basically fit "inside" the one before it.
...and the final highlight color was created by adding a drop of the Flat Flesh (955) tone to a larger drop of the base coat. This really warmed up the base coat and lightened it quite a bit. This was applied to only the very highest portions of the model
here are the final results:
I hope that was helpful...please ask questions in the comments if anything was unclear. Just to reiterate I think the important thing here is the base color that is not completely black but which incorporates a tiny bit of the colors you will use later to highlight. And it doesn't have to be these colors...I chose to use fairly warm colors that would complement the yellow and white. I've created a "soft warm" black if you like. If I wanted a different effect I might choose to create my base coat using a dark blue and blue grey colors mixed with black to get a cooler more "crisp" black....experiment and find which mix works for you and the figures you are painting.
After finishing up the black areas I also took the chance to highlight up some of the greens and browns of the figures that have "off color scheme" elements. Here is how they are coming out. I honestly didn't care for the not-Robin Hood figure until I was highlighting him....the mustache grows on you!
That's all for now...next up will be working on the yellows and whites.
Cheers,
Blue


A most informative tutorial. Thank you for sharing!
ReplyDeleteInteresting concept there Blue. Like you said, its hard to see in the pics, but i'll give it a go myself as I think this technique makes a lot of sense.
ReplyDeleteThanks.
Wicked, thanks mr blue, all of the leather and weapon shafts are black in my skaven army I'll definitely be putting this to use.
ReplyDeleteVery intersting technique I will try when I get the occasion. I've been taught the same thing and to use both a warm colour and cold colour to highlight black to give it more depth (a rich brown and a cold bluish grey for example) and your technique seems to use the same principle.
ReplyDeleteI'm amazed to sse how it turns out. I always find myself needing a black wash (1/3 black, 1/3 matt medium, 1/3 water) to kill the greyish effect when I highlight black so this is an option which has to be considered.
Very NIce Bloo...Very NIce ;)
ReplyDelete