First the Beard...The base color I used is VMC Chocolate Brown and the first layer of highlight I applied is Reaper Master Series Earth Brown (9029)

The next step add The classic Citadel color Bubonic Brown to the mix...probably 50-50%
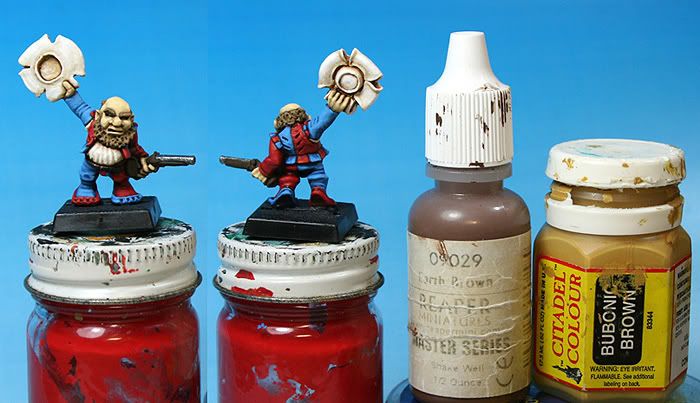
And this was followed by straight Bubonic Brown

And finally a bit of VMC Buff (976) was mixed into the Bubonic Brown and sparingly applied to the ends of the beard hairs.

With the Beard done we have the belt/bag and the Pistol left to take care of. The belt and bag were highlighted with a mix of VMC chocolate Brown and Citadel Bestial Brown and then with straight Bestial Brown. The pistol is highlighted with stripes of bestial brown followed by stripes of PolyS Canine Yellow Brown to simulate wood grain.

Ha...Well you can barely see the difference...but oh well...I took the picture and so you have to look at it! For the metals...I decided to go with a copper color for the pistol furniture. I chose an old battle of Citadel Dwarf Bronze for these parts. This was then highlighted with a mix of Dwarf Bronze and Citadel Mithril Silver. The pistol barrel, which had be base coated with Bolt Gun Metal, was highlighted with Mithril Silver.

Then to tone down the metals a bit I gave them a wash. The Bronze areas got a Gryphonne Sepia wash and the iron portions got a Badab Black wash

In essence this figure is done...but there are a couple of minor details that need to be dealt with...mainly...this guy needs some eyes. Now I know many excellent painters who don't bother giving their figures eyes...but with these excellent dwarf sculpts there is plenty of room for eyes and I think it really gives the figure some personality. I also wanted to add just a small stripe of white in his mouth to suggest some teeth. I had left the eye socket block from the primer coat so just had to lay down a layer of VMC Offwhite for the white of the eye and s spot of PolyS Night Black for the pupil. The Offwhite was also used to pick out the teeth.

Here is a close up view so you can actually see what I'm talking about...

I've been playing with my Movie maker software and threw together this short video which pulls all the images I've posted for this walk through into movie form.
Now all I have left to do is to varnish the figure and complete the base. This is well underway and I'll put up the finished picture tomorrow.
Cheers,
Blue
Excellent tutorial - picked up some good tips!
ReplyDeleteNice touch with the vid.
Great paint, love the progression as a movie. That many steps huh? That explains a lot about my own deficiencies...
ReplyDelete