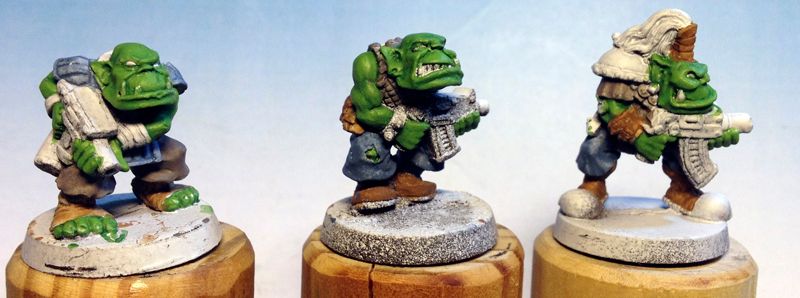
My new reality for the foreseeable future was that I would only be able to sit at the painting desk for very short (30-45minute) sessions once per day. This is required a new system. So I quickly forgot about the squats and focused on a group of the Orks. Having read about some new (to me) fast painting techniques I decided to give one a try.
I started by base-coating the figures with my normal Dark grey primer. I then attempted to give them a Zenithial Highlighting...which I found was hard to do with a spray can....but there was no time for a second attempt...so I went with it. Here is what they looked like....as you can see the droplets of spray from the can are too big and coarse...I can see why most folks that employ this technique do so with an air brush.
Here is what they looked like.


I then did the same thing to the cloth, leather and armor portions of the models.
Once dry and coated with Vallejo brush on Matte varnish I painted up the metal areas using my normal technique and took care of any details like eyes and teeth.....and they were done! Record time for me...I bet I spent less than 3 hours painting 6 miniatures...thats fast for me! No they won't win any prizes...and they got stomped in the competition...but I got a new team in (personal victory) and I didn't further injure my ankle by spending too much time at the desk...here is the final result
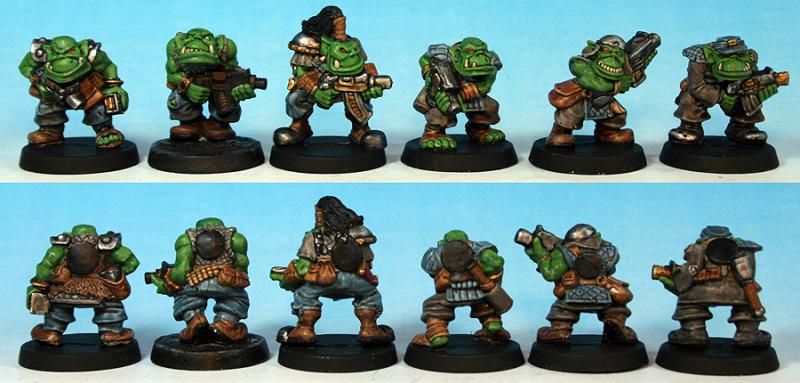
I found this new (to me) technique to be very interesting and something that I hope to refine in the future....perhaps a post dip highlight on the flesh might make them "pop" at bit more. I think a finer spray for the zenithial highlight like you can achieve with an airbrush would make a major difference as well....I might just have to put one on my wish list.
Cheers,
Blue
I tried a similiar technique a while back, undercoat black then drybush the whole mini with a light grey or white. Then you just go ahead and paint it as per usual.
ReplyDeleteI was pretty happy with it actually, coz it showed the areas to be painted & the ones to be left alone (shadow) in stark contrast.
cheers
I use this with most of my models at the momment but I use brown lets me leave belts and bags with just a little highlights.
ReplyDeletePeace James
hope your pain gets less soon
I think they look very effective, especially for the time spent. I have tried variations of the technique and a quick highlight after the stain does work quite well. In fact, I believe many of the old 'Eavy Metal techniques Mike McVey wrote about involved a basecoat, inking to shade, then highlighting (though he did more than a quick highlight!!).
ReplyDeleteI also really like the models. I had not seen them before I saw your entry in the LPL. I haven't yet been able to find any on eBay for myself!