**Editorial
Note** Since its initial posting, I have modified a few things and
added some details to this post. I also moved the Narrative section to a
separate post all together, combining it with the other narrative
section from the preliminary post. The new Narrative section can be found HERE
Hi all,
I'm back with the third and final part of my Battle Report covering my first game of, and initial thoughts on, Oathmark: Battles of the Lost Age. While I've yet to finish my story and the report...I think that the very fact that this single game has inspired me to write such a lengthy and detailed battle report...as well as an associated Narrative...should give you some idea of what of how much I like this new rules system.
Anyway, more on that later. Lets catch up the story with our battle report.
The first and second installments of this report can be found here: Oathmark Post I and Oathmark Post II.
Alright...now that we have caught up with Louis...lets catch the Bat rep up with the Narrative.
Turn Three
Initiative was won by the Elf/Dwarf forces and the Elf archer unit was the first to be activated. They drew and loosed their fury on the Cavalry unit...

...completely destroying it.

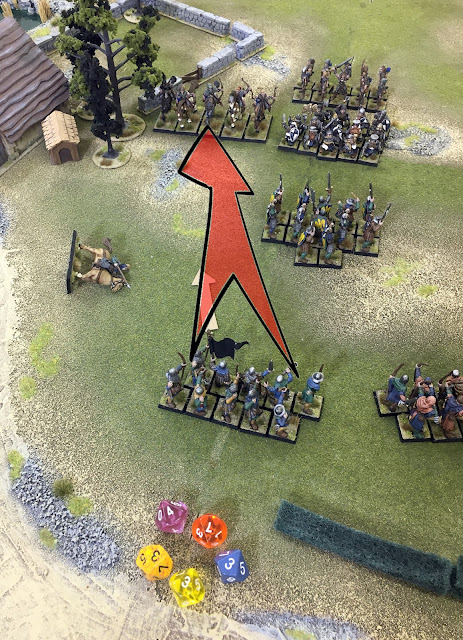
On the right flank of the human line the Spearmen fully activated, allowing them to advance beyond the farm building and wheel to the left, making good their efforts to turn the enemy flank.

In response to this newly revealed threat the Elf soldiers pivoted to their left and advanced toward the spearmen.


In the center of the line the Halberd unit fails to fully activate and shuffles forward timidly toward the dwarfs.

Hoping to further soften up the enemy before contact, the Elf mounted rangers loosed a volley at the Halberdmen, but failed to cause any damage. They then leapt lightly over the stone wall and advanced to cover the right flank of the dwarf warriors.


The human archers, which now formed the left flank of the human line, loosed an ineffective volley at the mounted rangers and then moved forward to close up on the left flank of the halberd unit.

Next I chose to activate the dwarf unit. The time had come for them to crush the puny humans...or at least cut them off at the knees! But...
...they failed to fully activate..

...and so even though the enemy was in their reach, they decided to ease their way forward, dressing there lines and steeling their nerve before contact.

The final unit to activate for Turn Three are the other Human Archer unit, Toby's Boys.

The unit fully activated and opted to fire a volley at the slowly advancing dwarf warriors. They managed to cause two casualties.

The unit then advanced, taking up position behind, and to the right, of the halberd unit.

Thus ended Turn Three.
Thoughts
I had been sure that I would have witnessed my first hand to hand combat in this turn. Instead the activation system played it's roll and added a new level of tension and interest to the coming conflict. Both the Halberds and the Dwarfs had had the opportunity to come to grips with their enemy, but then both had turned out to be reluctant to do so. From a commanders point of view this is very frustrating, from the POV of a lover of narrative games, this was "story" baked into the game! I loved it!

Turn three also revealed the devastating power of massed archery, particularly from elves. The complete destruction of the cavalry unit came as shock to me. Interestingly, the rest of the human army didn't seem particularly shocked. By which I mean there is no mechanism built into these rules for such a situation. In WFB 3rd ed, the complete destruction of a unit would have caused a panic test among any surrounding friendly units that just watched all their comrades die. There does not appear to be a Morale check for situations like this in Oathmark. Perhaps something that could be house ruled.

Turn Four
Turn Four started with the combat hat I had expected in Turn Three! Initiative went to the Dwarf and Elf forces and I successfully activated the Dwarf warriors and they entered combat with the Louis and the Marquis' Halberdmen.


But it did not go well for them! Combat in Oathmark is simultaneous and the dwarfs only managed to cause one causality while the halberds killed four dwarfs!

As both forces took casualties, both units hadto take a Morale test. That Morale test is affected by the number of casualties that a unit has sustained that turn, therefore I assumed that the dwarfs were in trouble and the halberdmen would be fine, but the opposite turned out to be true. The Dwarfs, though defeated and forced back from their enemy did so in good order and maintained their unit cohesion. The Halberdmen, on the other hand, were apparently stunned by their dramatic victory over the feared enemy and became disordered.

In Oathmark the victors of a round of combat can determine how far to push back their defeated enemy. They can move them back 1" or 6"...in this case the Halberds opted to throw the enemy back a full 6", which in turn caused the Elf archers to have to back up about 1.5" as well to maintain spacing.

Next to activate were the Human archers to the left of the Halberd unit who fired a volley into the mounted Elf Rangers killing two of them.

Activation shifted back to the Elfs and I activated the Elf warriors, they charged into the Spearmen who had flanked their line...

But, they suffered a similar fate to the their bearded comrades...they lost four fighters while the humans lost only a single spearman.

Having apparently impaled themselves on the human spears the elf warriors were pushed back 1" and both units passed their Morale check.

With the principal combat out of the way the rest of the turn was dominated by archery.
Toby's Lads killed three more of the retreating Dwarf warriors.

the Elf Archers killed two more Halberdmen from behind the reforming dwarfs.

...and as they were the only unit left, the mounted Elf rangers fired a volley at the halberds but missed entirely.

They then backed up to consolidate their line with the Dwarf Warriors.


Here are the final dispositions of the combatants at the end or Turn four.
Thoughts
Wow! The human troops did better in both combats than I expected them too. I was particularly surprised with the outcome with the spearmen. The Elfs really got slaughtered by them...which to my WFB-tainted mind didn't seem possible. This was my first real understanding to the difference between troop types. In the case of both the dwarfs and elfs their units were made up of "soldiers" while the human units were Spearmen and Linebreakers...both of which are basically elite troops compared to "soldiers" even when those soldiers were from a race perceived to be better fighters than humans.
My experience from WFB told me that this was humans with halberds against dwarf warriors when a better analogy would have been basic dwarf warriors against Reiksguard elite warriors. With that frame of mind the outcome of the fighting makes more sense...understanding of the different troop types in Oathmark just became much more clear.
In general, I liked the combat system as well. Combat is simultaneous...each force rolls up to five d10 (assuming a complete first rank) their target number to hit is determined by subtracting the attackers Fight skill from their victims Defense score (with some additional modifiers hee as well). Any roll that is equal to or over the target number causes a hit. It is basically the WFB to-hit roll, to-wound roll, and saving throw all lumped into the roll of a nice handful of d10s...no buckets of dice here...the number of ranks of archers may increase the likelihood of your five dice causing damage, but it does not increase the number of dice you roll.
As mentioned the Morale system also proved to be interesting, and to add some uncertainty into the game. Morale is checked against the same stat that you use for activating your troops, and I find that elegant as well. There are a number of modifiers that need to be incorporated each time (number of ranks, number of casualties suffered, etc etc.) but the math is simple and straight forward.
Turn Five
Initiative shifted back to the Marqui's forces and I chose to activate the Bleeding Harts first, they were desperate to finish the destruction of the Elf warriors and so advanced into them again.
And once again the Spearmen got the better of them, killing four more warriors, though at a cost of two of their own

Once again the Spearmen pushed their enemy back 1"...and hoped to finish off the last two foe next turn. The Elf warriors failed their Morale check and became disordered.
On the other side of the battlefield the Monted Elf rangers unleashed a volley on the human archers to their front, and managed to kill 3 of them

...and then reversed course from last turn and moved forward a few inches...

Those archers returned the favor and knocked another ranger from their saddle.

After which, they also moved forward.

The Dwarf warriors activated next and determined that they wanted the protection of a stone wall to fight behind, so they pivoted to the right and moved toward the stone walled paddock, making it to the wall but not over it.

With their primary enemy apparently fleeing the field, Louis and his halberdmen advance hoping to break open the center of the enemy line...

instead they come nearly face to face with the Elf archers, who pour a devastating volley of arrows into the halberds killing 5!!

The halberds fail their Morale check and become disordered, while the Elf archers casually stroll backward further out of reach of their enemy.

Toby and his archers move up behind the decimated halberdmen and fire a volley into the mounted Elf rangers killing one and leaving only one remaining.


And that was it for Turn Five. I can tell that the end is nigh, so lets move keep right on moving.
Turn 6
The Marquis' troops held onto the initiative and activated their spearmen first, hoping to wipe out the Elf warriors and collapse the left flank of the enemy warband. Once again they advanced into the remnants of the Elf warriors. Amazingly the Elf hero and his only companion were able to inflict two wounds on the spearmen while only suffering one themselves...thus winning the combat. This resulted in the commander of the Elf unit pushing back the spearmen 6" ...and making good his escape.
It was at this point that I opted to end the game. With advance of the Halberdmen crushed by Elven arrow fire, and the assault of the Spearmen on the flank stymied by the remnants of the Elf warrior unit, the Dwarf and Elf forces had found the space they needed to slowly retreat from the battle. The forces of the Marquis had also had enough, and chose not to push the issue further and suffer more devastation at the hands of the enemy archers.
Final Thoughts
Man, I like this system. Obviously I've only played a single basic game at this point, but my initial impressions are quite good. (A feeling I never had with Dragon Rampant). I like the way the activation sequence keeps both army commanders at the table and engaged in the action at all times. Combat and shooting are both quick to resolve and the morale system seems adequate (with the one caveat I mentioned above). I'm really looking forward to incorporating some characters and other troop types into these armies for another battle soon!
Nice write up, Thanks!
ReplyDeleteNice report. The game seems to flow really well. I like the idea of the three WFB rolls apparently combined into one. I might need to take a look at Oathmark. Looking forward to the next report.
ReplyDeleteBeautifully illustrated, composed and executed. The alternating activations makes for an engaging report. Thanks Blue!
ReplyDeleteThanks Johnathan, your series of videos was a big help in making my first game as smooth as it was. thanks for those.
ReplyDeleteThanks Chris
ReplyDeleteI've been thinking about getting this set of rule... I am now hooked.
Great report and explanation of the mechanics.
Thanks Maj. I started a larger and more complicated game last night and will report back more on that ASAP.
Delete